Quick Invoice V1 — User Guide
A practical guide for small businesses, freelancers, and shops.
Table of Contents
- What is Quick Invoice?
- Getting Started
- Dashboard
- Business Information
- Currency
- Customers
- Products
- Categories
- Creating an Invoice
- Invoice Items
- Prices & Discounts
- Invoice Status
- Payments
- Receipts
- Viewing an Invoice
- Searching & Filtering
- Printing
- Print Formats
- Print Language
- CSV Export
- Dark / Light Mode
- Language
- Account Settings
- Report a Problem
- Clear Invoice Data
- Rules & Limitations
- Feature Reference
What is Quick Invoice?
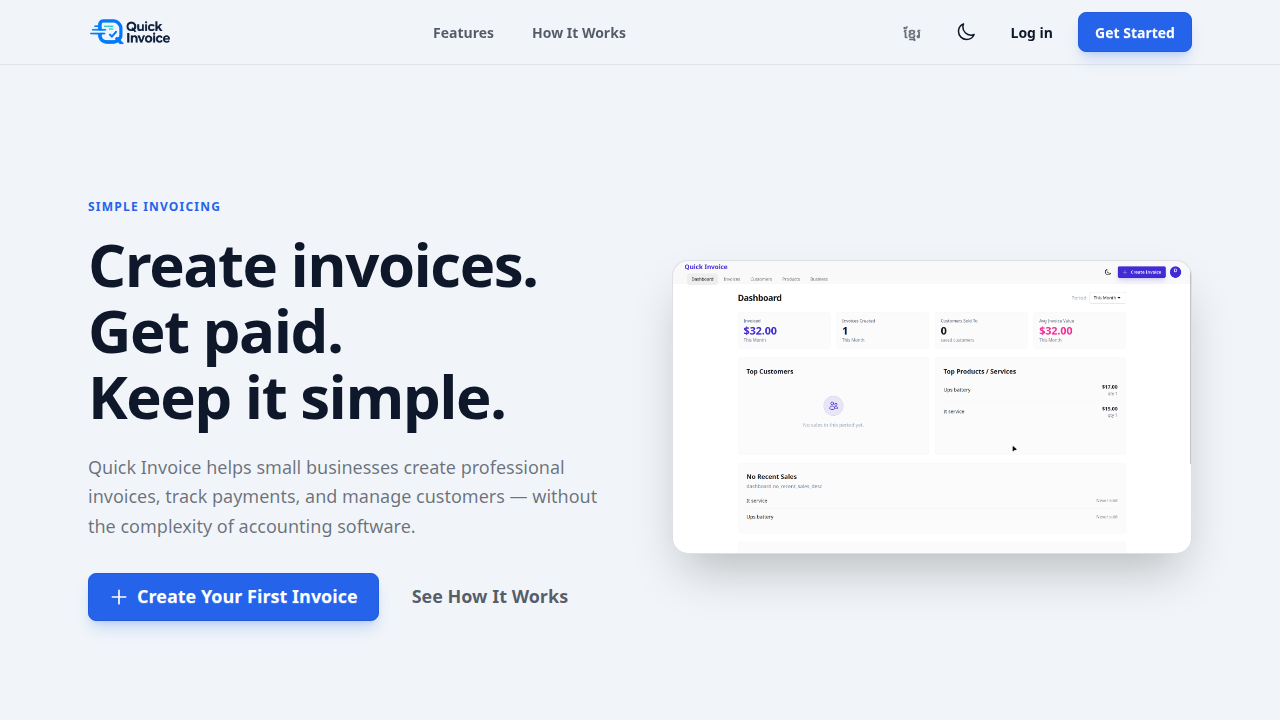
Quick Invoice is a simple invoicing tool for small businesses. It helps you:
- Create professional invoices in seconds
- Track payments — full, partial, or unpaid
- Manage your customer list
- Print invoices in multiple formats (A4, A5, 80mm receipt, 58mm receipt)
- Print receipts for individual payments
- Share invoices via a secure link
- Export invoice data to CSV
It is designed for shops, freelancers, and service businesses — not complicated accounting software.
Getting Started
Create Your Account
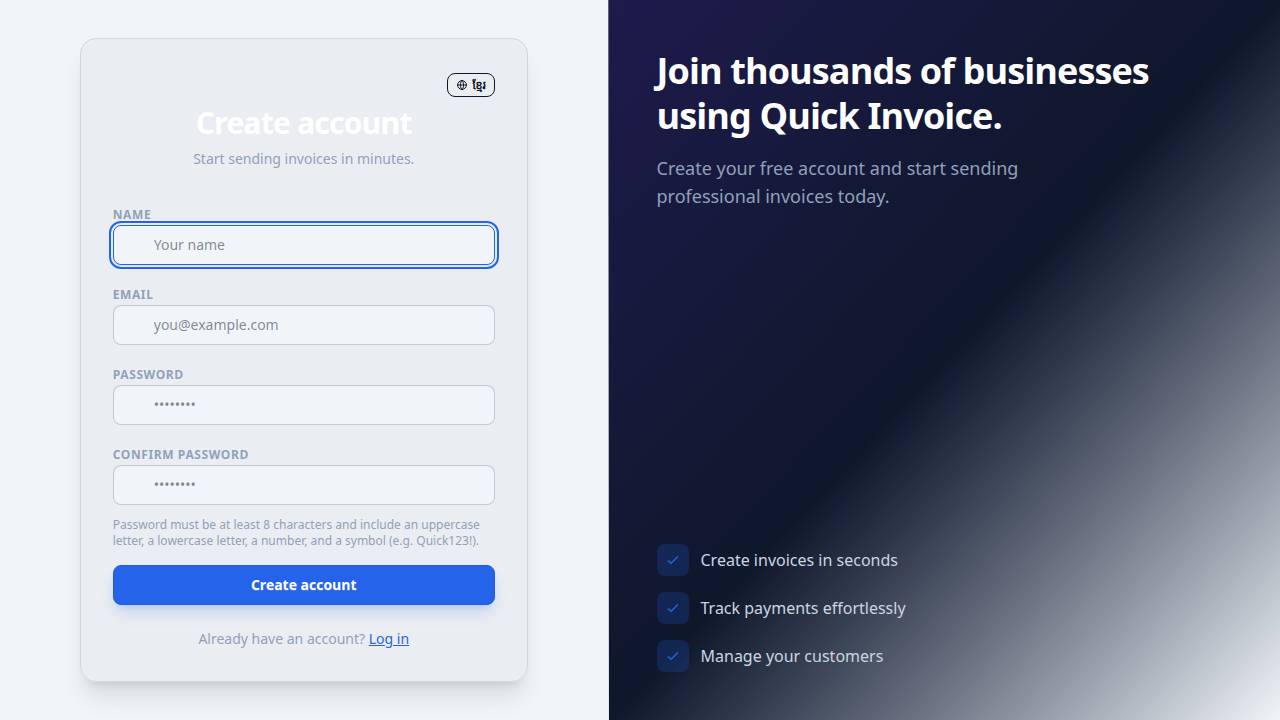
- Go to your Quick Invoice website and click Get Started.
- Enter your name, email, and a password.
- Password must be at least 8 characters and include uppercase, lowercase, numbers, and symbols.
- Click Create Account.
- Check your email for a verification link and click it.
Set Up Your Business
- After logging in, go to Business in the top menu.
- Enter your Business Name (required — this appears on invoices).
- Add optional details: owner name, phone, email, and logo.
- Choose your invoice header style and default print format.
- Select your Base Currency (USD or KHR). Important: Currency locks after your first invoice.
- Add optional footer lines (return policy, payment terms, etc.).
- Click Save Business Details.
Dashboard
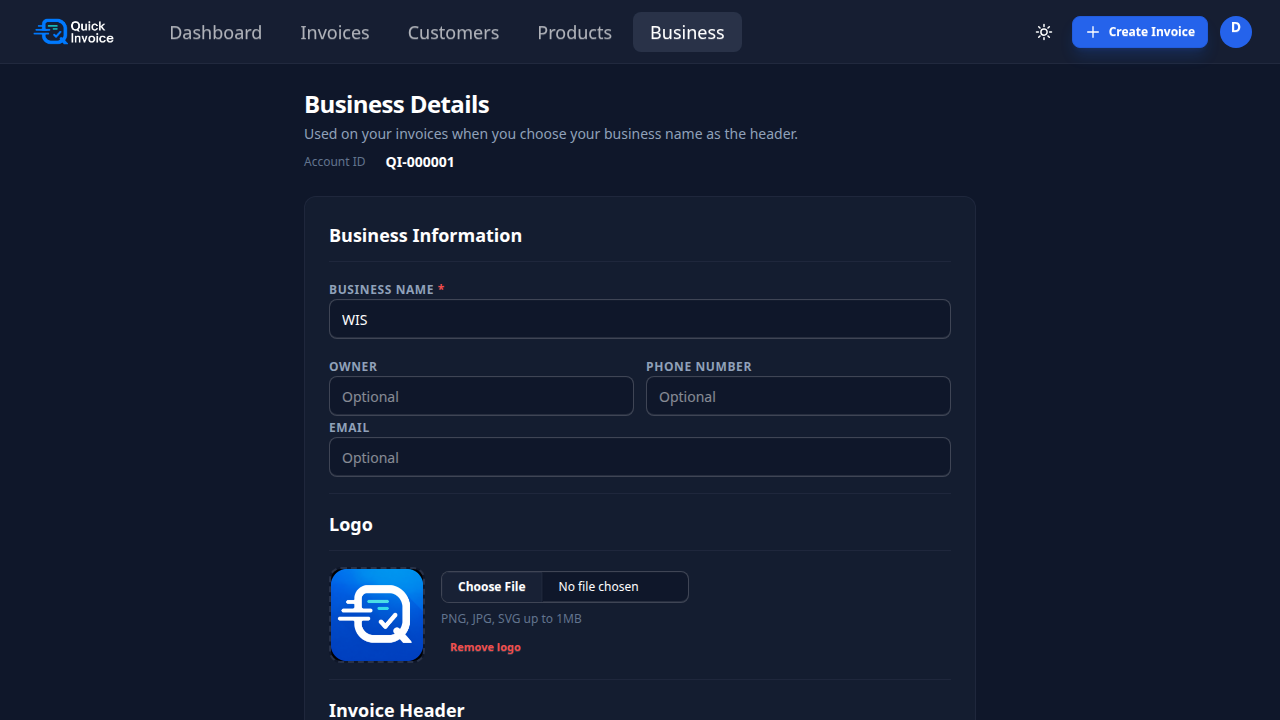
The dashboard shows your business overview at a glance:
- Total Revenue — sum of all invoice totals
- Invoices Created — count this month
- Customers Served — unique customers this month
- Avg Invoice Value — average total per invoice
- Top Customers — your best customers by spending
- Top Products / Services — most popular items
- Recent Sales — latest invoices
Business Information
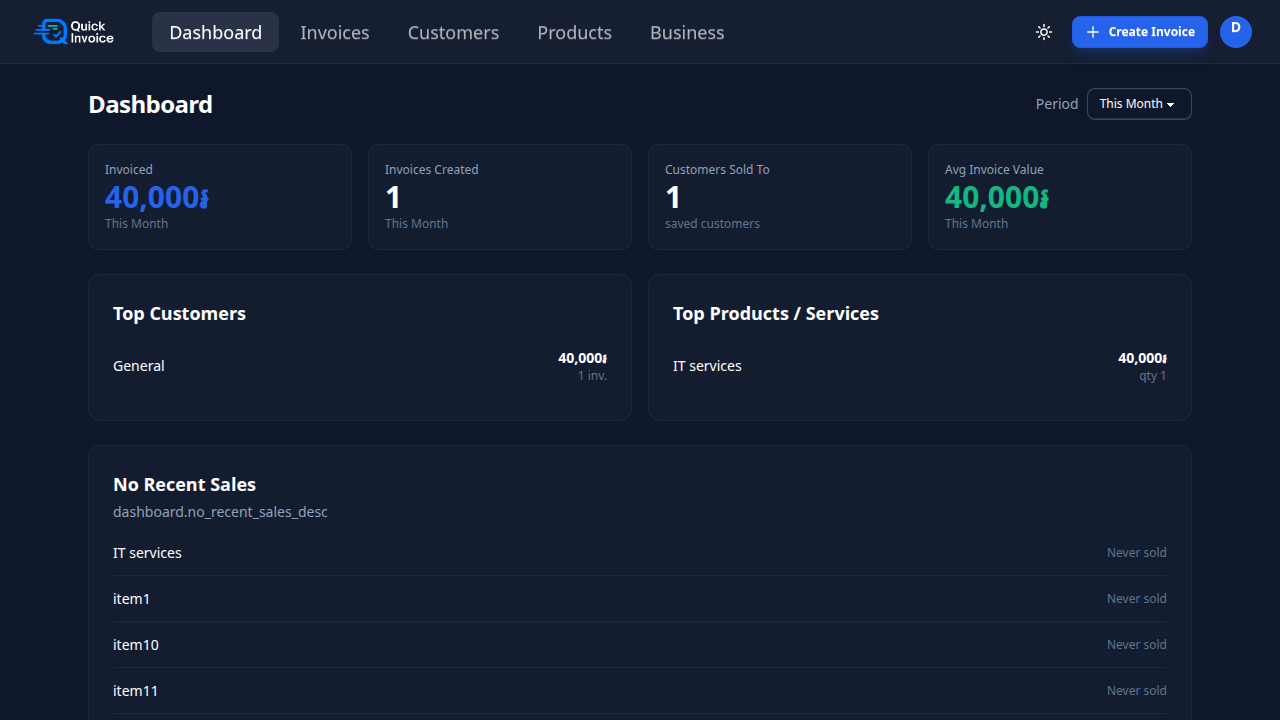
The Business page lets you configure how your invoices look.
Business Details
- Business Name (required) — appears on invoices as the header
- Owner — optional, for your reference
- Phone / Email — optional, appears on invoices
- Logo — upload PNG, JPG, or SVG (max 1MB). Appears on printed invoices.
Invoice Header
Choose what appears at the top of your invoices:
- Default — shows the word "Invoice"
- Business Name — shows your business name instead
Print Settings
Choose your default paper size. This format is used automatically when printing:
- A4 Invoice
- A5 Invoice
- 80mm Receipt
- 58mm Receipt
Invoice Notes / Terms
Add up to 3 footer lines (max 80 characters each). These appear at the bottom of printed invoices — useful for return policies, payment terms, or thank-you messages.
← Back to ToCCurrency
Quick Invoice supports two currencies:
- US Dollar (USD) — formatted as
$1,234.56 - Cambodian Riel (KHR) — formatted as
1,234៛(no decimals)
Exchange Rate
If your base currency is KHR, you can set an exchange rate (e.g., 1 KHR = 0.00025 USD). This displays the USD equivalent on printed invoices. Leave blank to disable.
← Back to ToCCustomers
Customers are saved automatically when you create an invoice. You can also manage them from the Customers page.
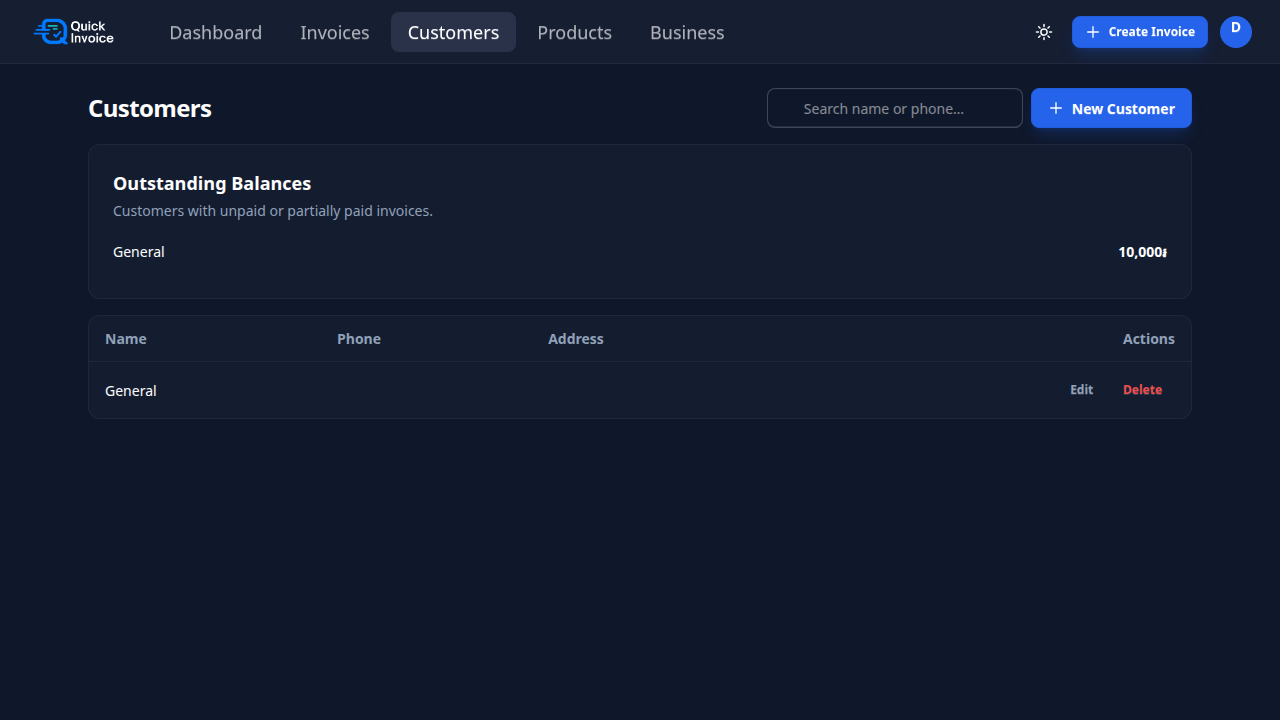
Customer Detail Page
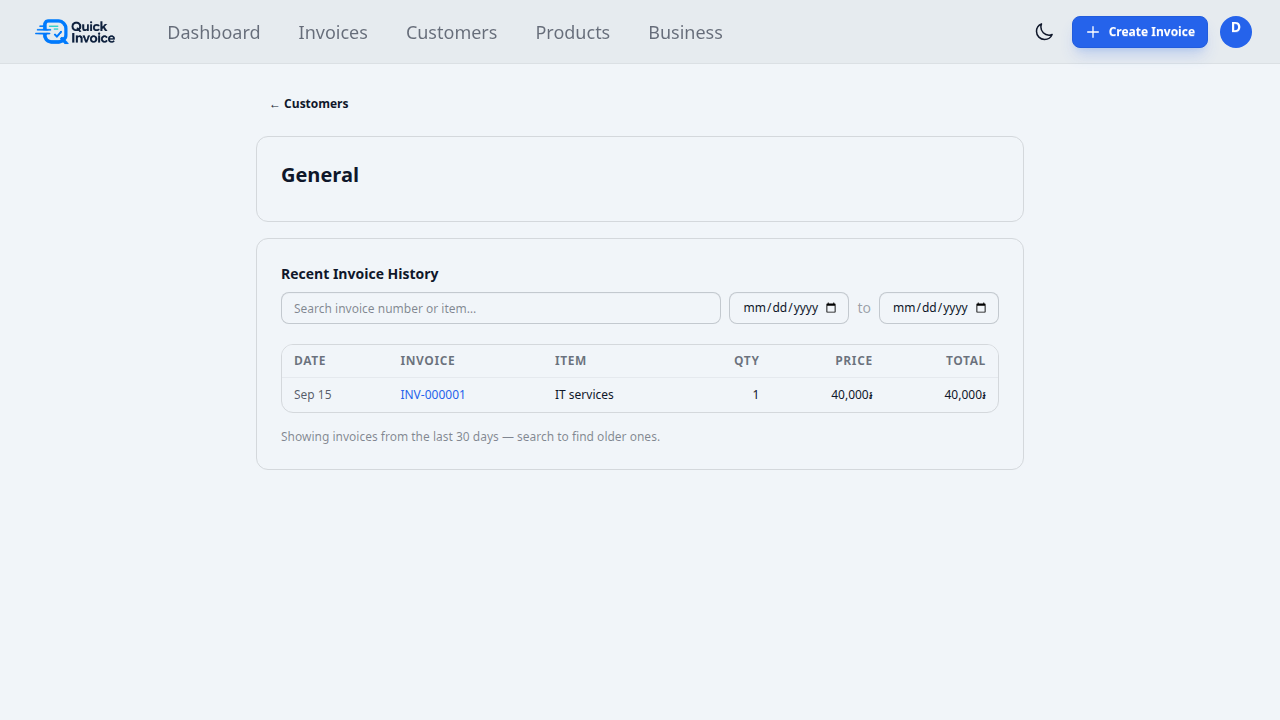
Click any customer name to see:
- Contact details (name, phone, address)
- All invoices for that customer
- Total amount and balance due
Products
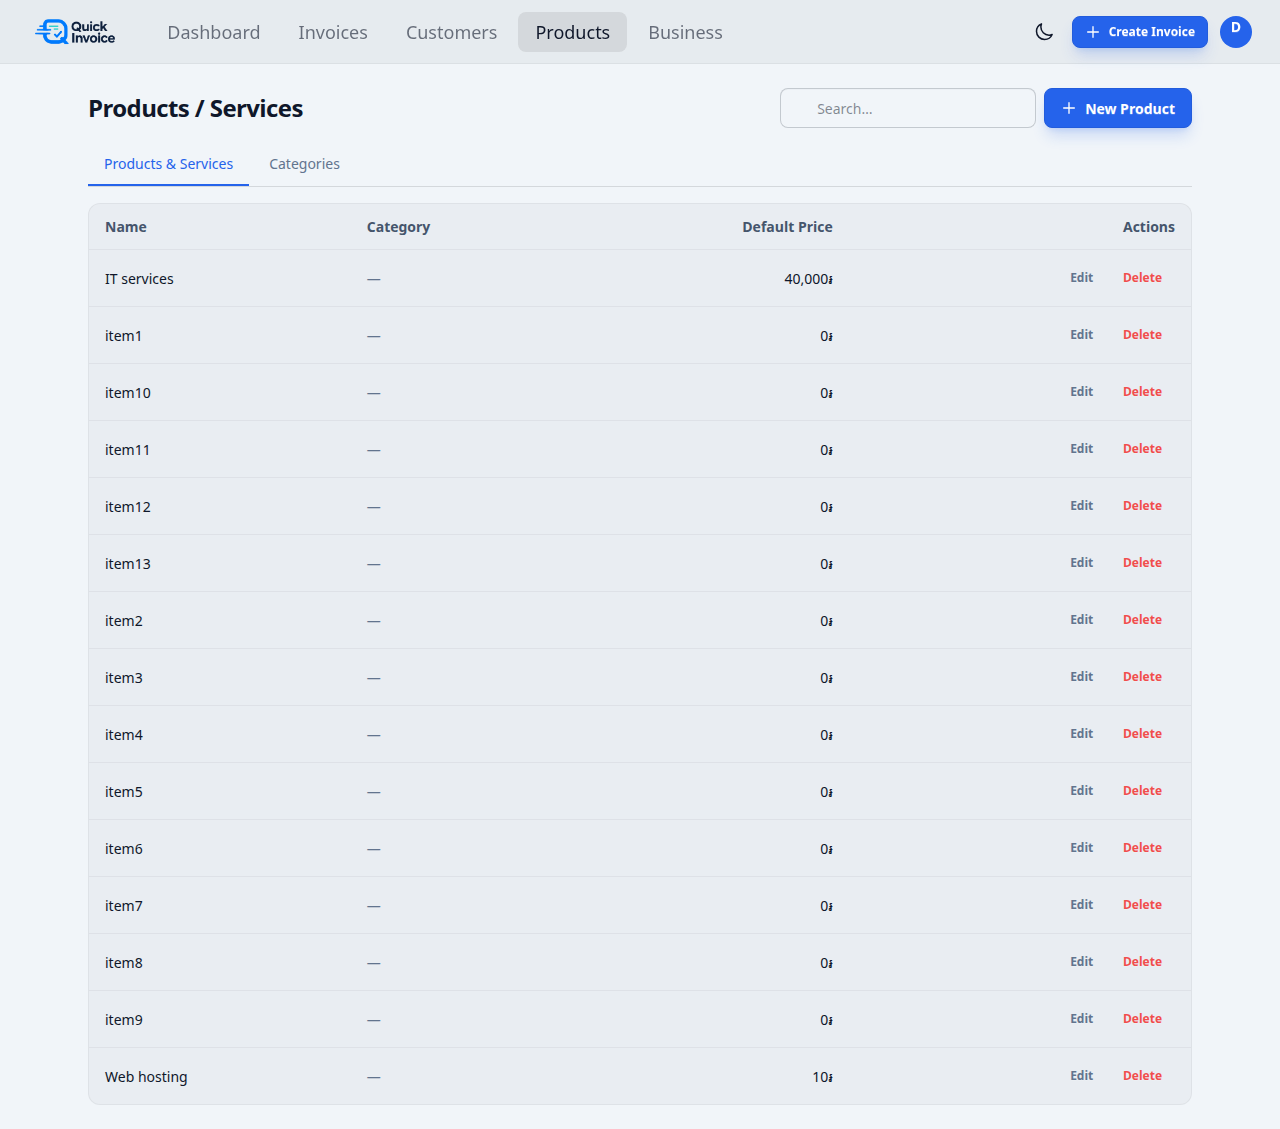
Products are predefined item templates. They save time when creating invoices by pre-filling the description and price.
What Products Are
- A product is a template — a name, optional category, and default price.
- When you click a product on the invoice form, it adds an item with that name and price.
- You can change the price, quantity, and description after adding.
What Products Are NOT
- Products are not invoice records.
- Deleting a product does not affect past invoices.
- Invoice items are independent copies — they store their own data.
Managing Products
- Add: Click "New Product" and enter name, optional category, and price.
- Edit: Click the edit button on any product.
- Delete: Click the delete button. This does not affect existing invoices.
- Search: Use the search box to quickly find products by name.
Categories
Categories help you organize your products into logical groups.
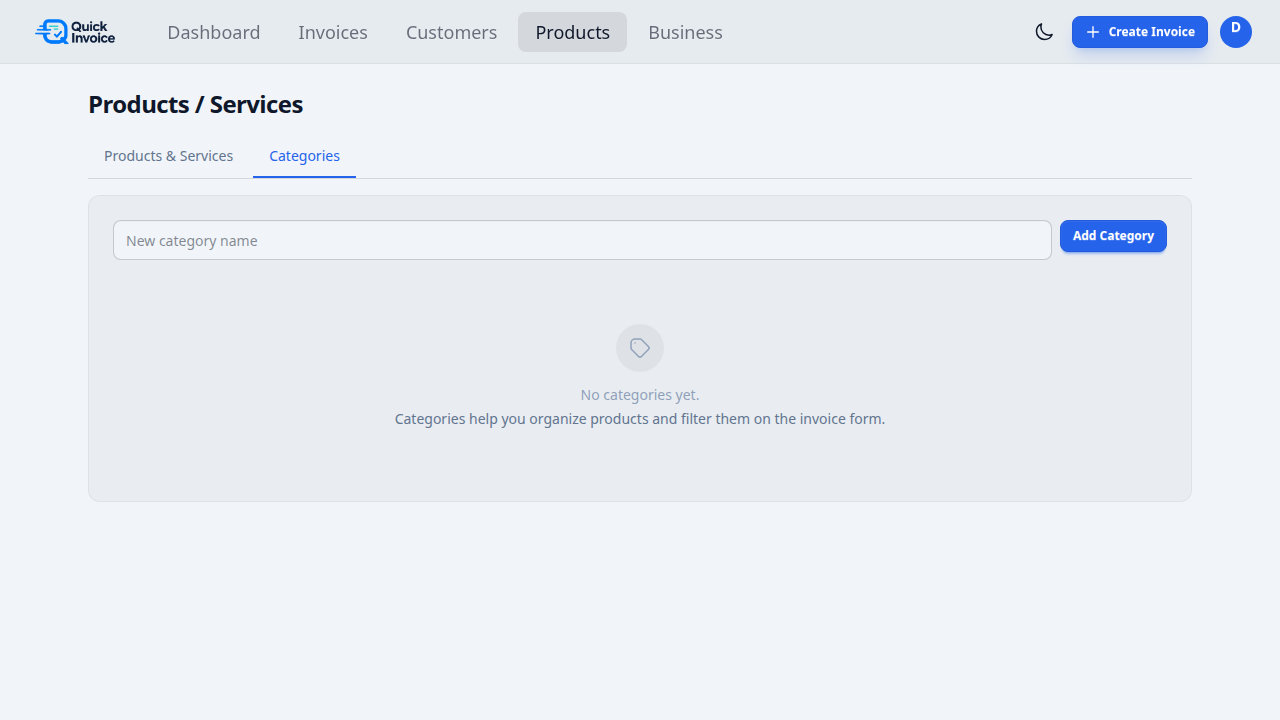
Managing Categories
- Go to Products in the top menu.
- Click the Categories tab.
- Click New Category to create one (e.g., "Services", "Products", "Accessories").
- Assign products to categories when creating or editing them.
How Categories Help
- On the Products page, you can switch between the product list and category list.
- When creating an invoice, products in the quick-add bar are visually organized, making it faster to find items.
- Categories are optional — you can use Quick Invoice without them.
Creating an Invoice
Click Create Invoice from the top menu or the Invoices page.
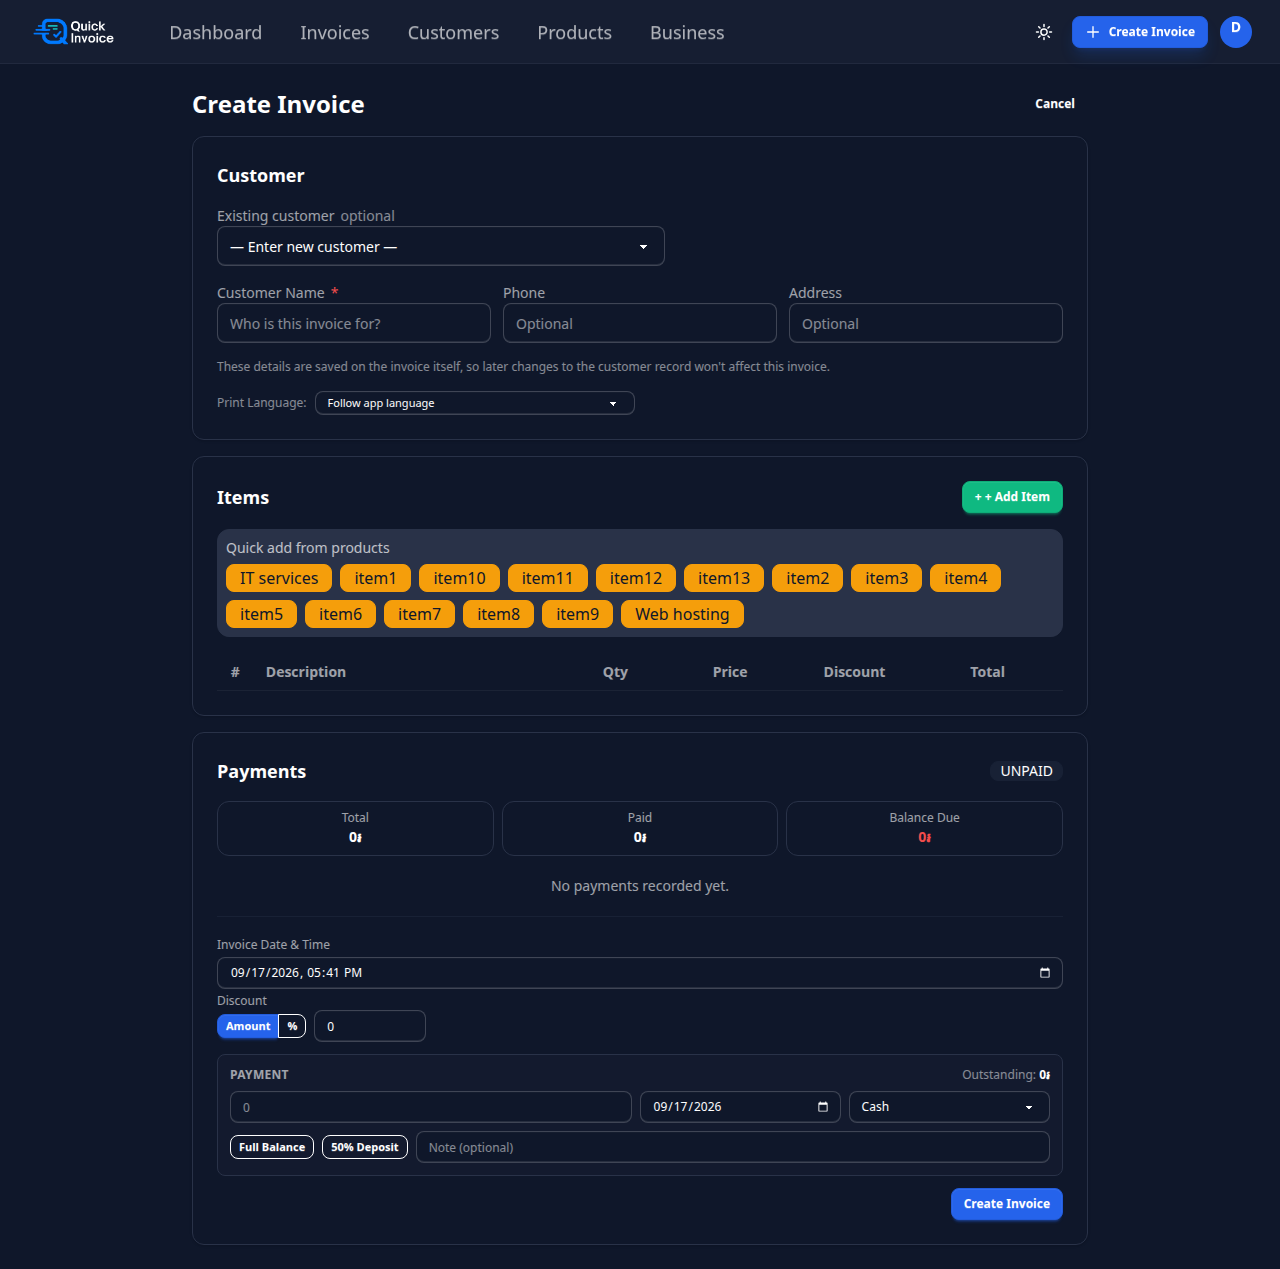
Step-by-Step
- Customer: Select an existing customer from the dropdown, or leave on "Enter new customer" and type the name, phone, and address.
- Add Items: Two ways to add items:
- Quick add: Click a product button from the "Quick add from products" bar. Products are shown as buttons with their name and default price. This is the fastest way to add common items.
- Manual: Click + Add Item to add a blank row, then fill in description, quantity, price, and optional discount yourself.
- Adjust details: For each item, you can change the description, quantity, price, and discount after adding.
- Invoice discount (optional): Use the discount toggle to choose Amount or %, then enter the value.
- Record a payment (optional): Enter the payment amount, date, and method (Cash / Bank Transfer / Other). You can also use the quick buttons: "Full Balance" or "50% Deposit".
- Set date/time: The invoice date defaults to now. You can change it.
- Print Language: Choose "Follow app language", English, or ខ្មែរ.
- Create: Click Create Invoice.
Invoice Items
Adding Items
- + Add Item: Adds a blank row at the top of the list.
- Quick add: Click a product button to add it with its default price.
- You can add as many items as needed.
Item Fields
| Field | Required? | Description |
|---|---|---|
| Description | Yes | What was sold or service provided |
| Quantity | Yes | Number of units (default: 1) |
| Unit Price | Yes | Price per unit in your chosen currency |
| Discount | No | Per-item discount (Amount or %) |
How Items Are Numbered
Items are numbered from the bottom up (1, 2, 3...) on the printed invoice, but displayed top-down in the form.
Merge Behavior
When saving, items with the same description, unit price, discount type, and discount value are automatically merged (quantities added together).
← Back to ToCPrices & Discounts
Item-Level Discount
Each item can have its own discount:
- Amount: A fixed amount off (e.g., $5 off)
- Percentage: A percentage off (e.g., 10% off)
Invoice-Level Discount
A discount applied to the entire invoice total, after all items are calculated. Same options: Amount or Percentage.
Calculation Order
- Each item:
Qty × Price = Subtotal - Item discount applied:
Subtotal - Discount = Item Total - Invoice subtotal: sum of all item totals
- Invoice discount applied:
Subtotal - Invoice Discount = Grand Total - Balance:
Grand Total - Payments = Balance Due
Invoice Status
Every invoice has a status based on its payment situation:
| Status | Meaning |
|---|---|
| UNPAID | No payments recorded. Full amount is due. |
| PARTIAL | Some payment recorded. Remaining balance is due. |
| PAID | Full amount has been paid. No balance due. |
Status updates automatically when you record or remove payments.
← Back to ToCPayments
You can record payments when creating an invoice or later from the invoice detail page.
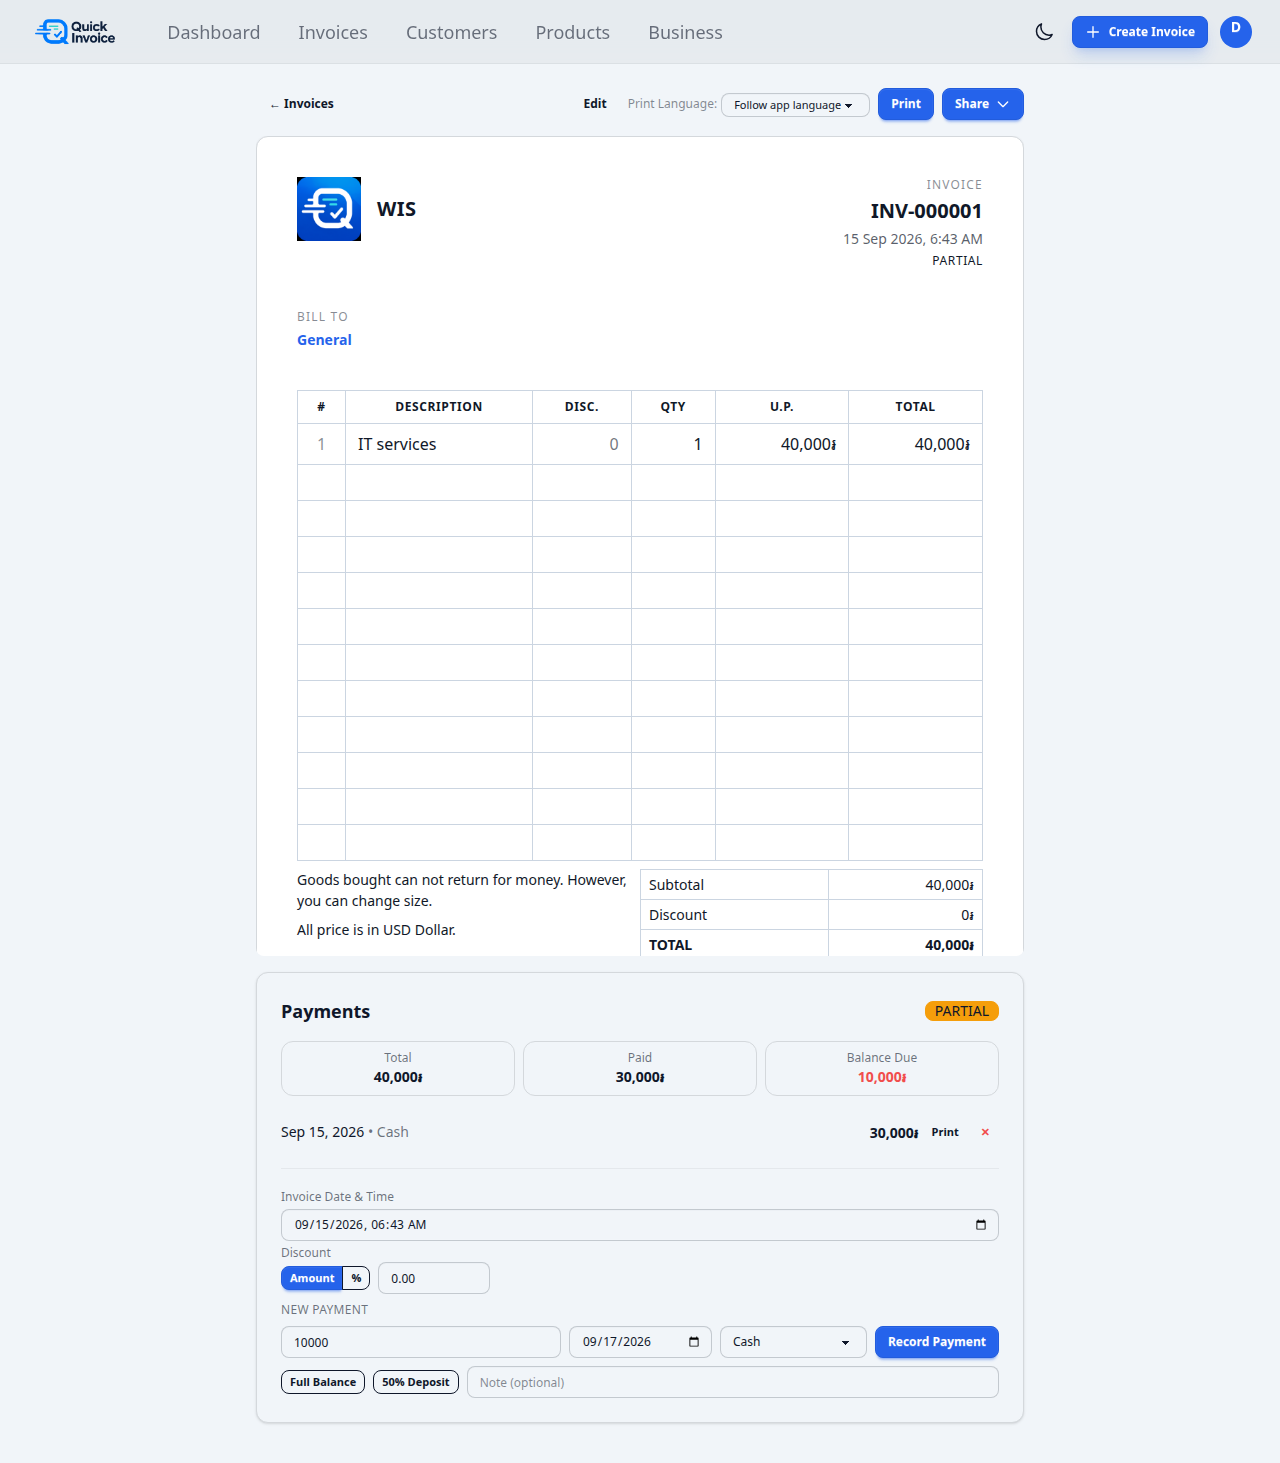
Recording a Payment
- Open the invoice (from the Invoices list, click the invoice number).
- In the Payments section, enter the amount.
- Set the date.
- Choose the method: Cash, Bank Transfer, or Other.
- Optionally add a note.
- Click Record Payment.
Quick Payment Buttons
- Full Balance: Fills in the remaining balance automatically. Use this when the customer pays the full remaining amount.
- 50% Deposit: Fills in half the total. Useful for requiring a deposit before starting work.
Partial Payments
You can record multiple partial payments over time. The system tracks each one individually. For example:
- Invoice total: 40,000៛
- First payment: 30,000៛ (status becomes PARTIAL)
- Second payment: 10,000៛ (status becomes PAID)
Removing a Payment
Click the ✕ button next to any payment to remove it. The invoice status will update automatically.
← Back to ToCReceipts
After recording a payment, you can print a receipt for that specific payment.
How to Print a Receipt
- Open the invoice that has a payment recorded.
- Scroll to the Payments section.
- Find the payment you want a receipt for.
- Click Print next to that payment.
- A receipt opens in a new tab, ready to print.
Viewing an Invoice
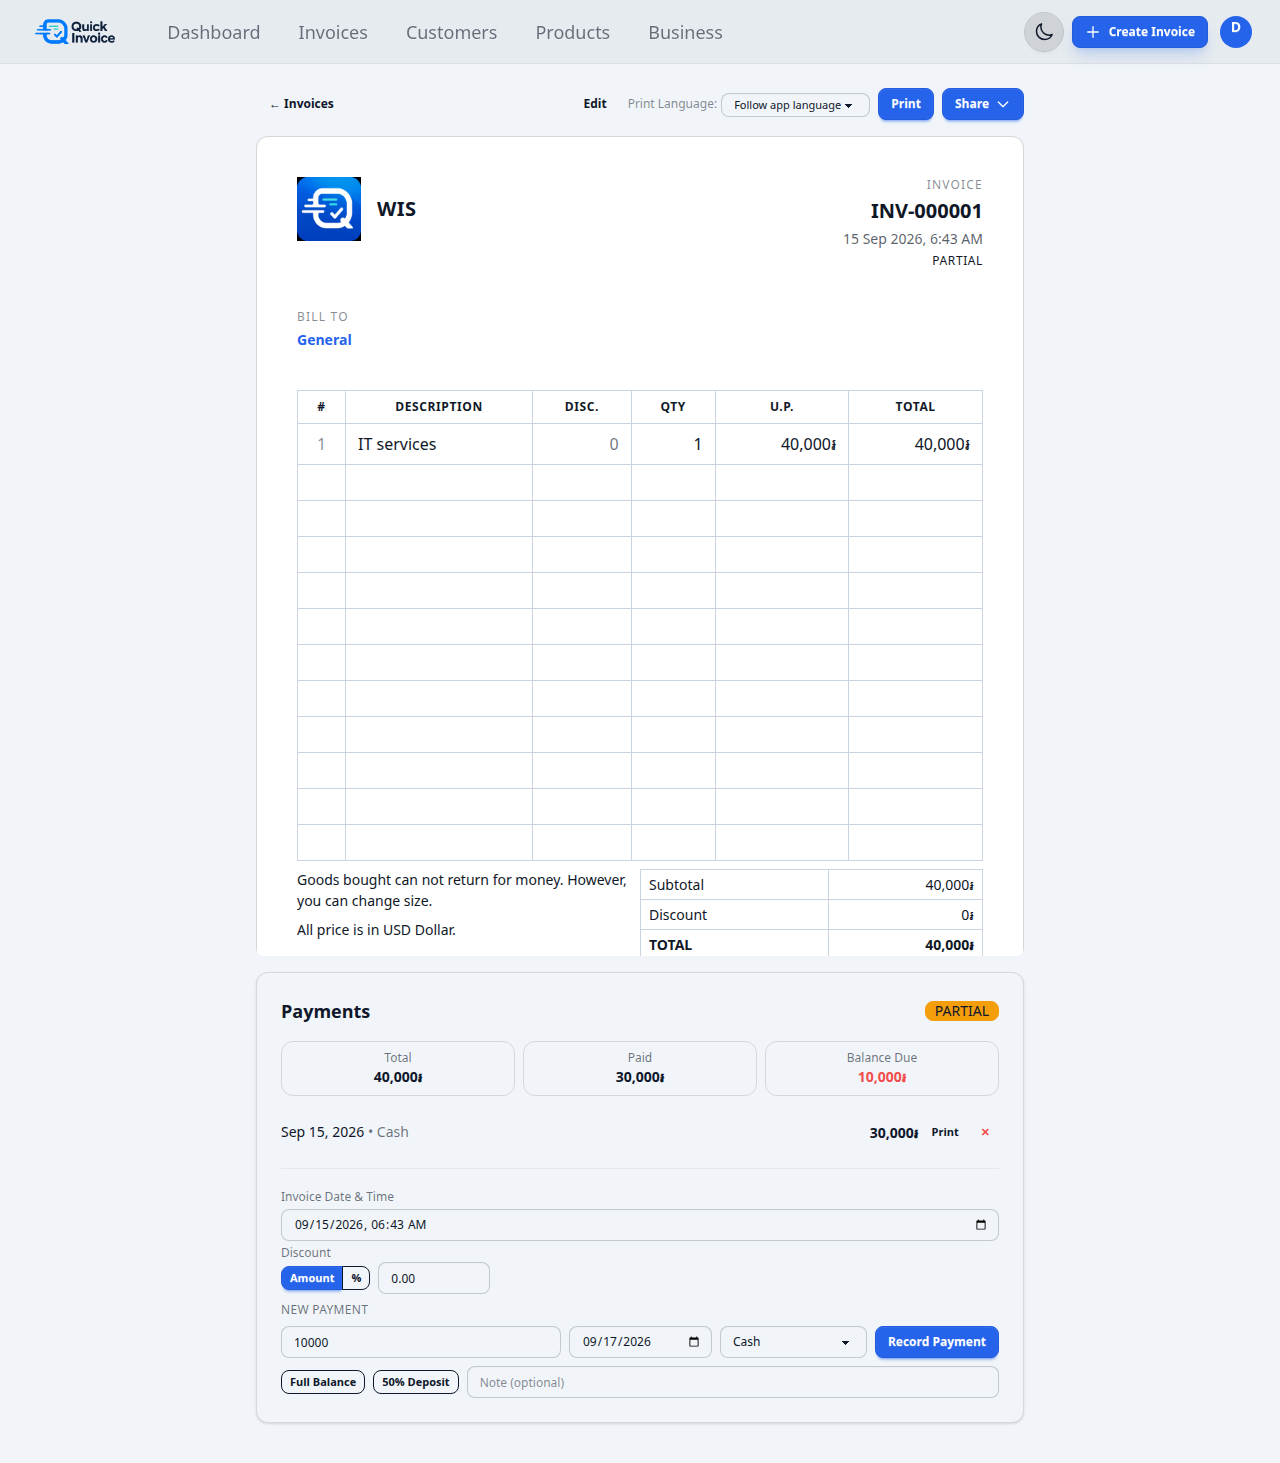
Click any invoice number from the Invoices list to see the full invoice:
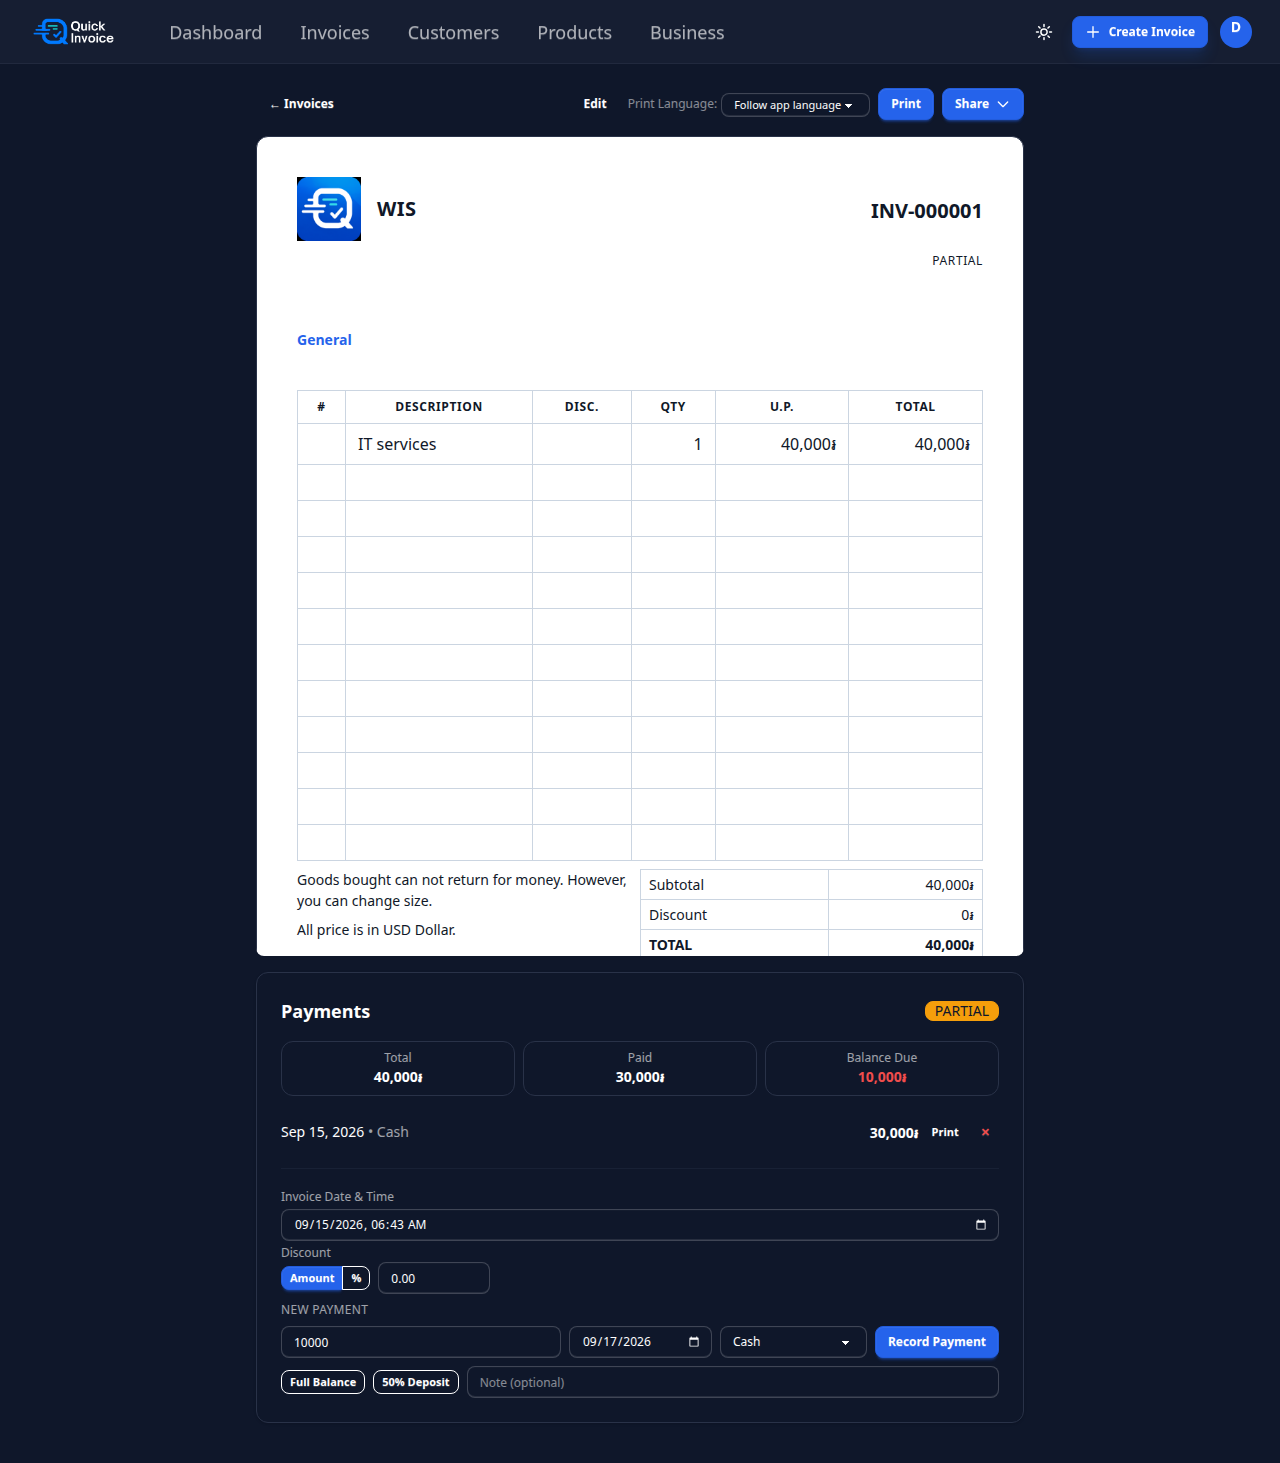
What You See
- Business header and logo
- Invoice number, date, and status
- Customer details ("Bill To")
- Itemized list with quantities, prices, and discounts
- Subtotal, discount, total, paid, balance due
- Payment history
- Footer terms/notes
Actions Available
- Edit: Modify the invoice details
- Print: Open print document in a new tab
- Share: Copy a secure link to clipboard
- Print Language: Choose English, Khmer, or follow app language
Searching & Filtering
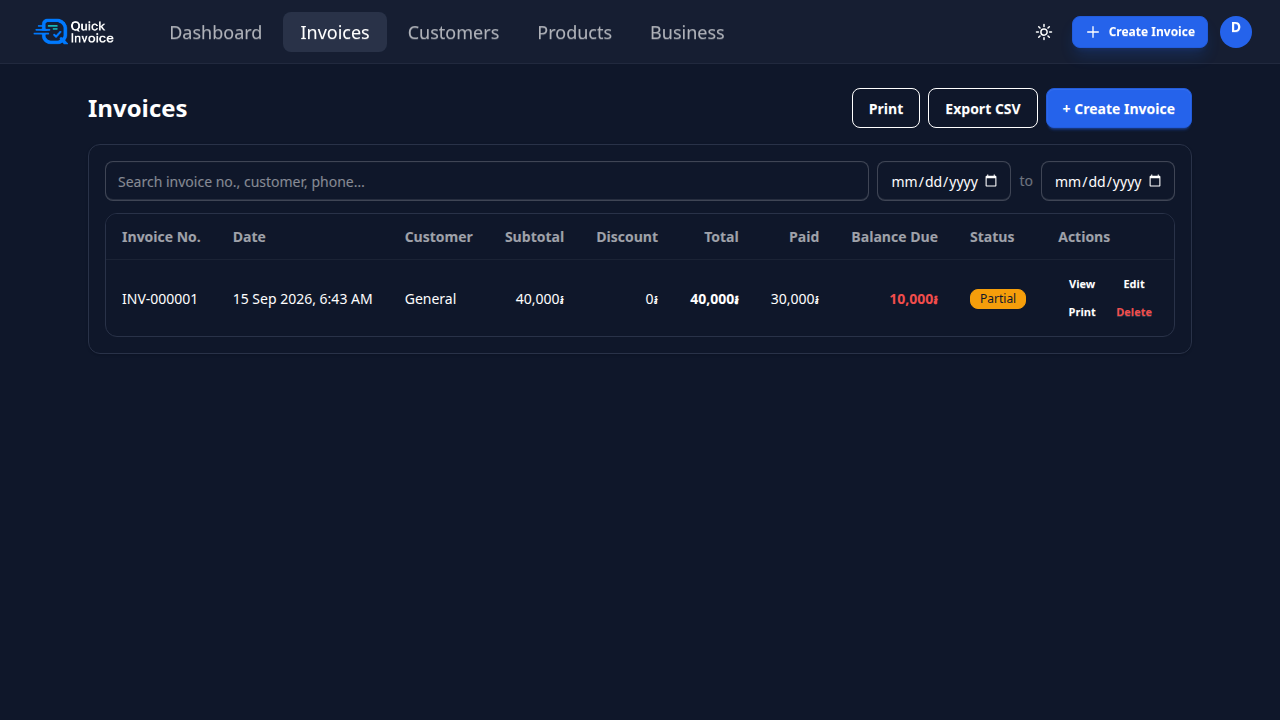
On the Invoices page, you can:
- Search: Type in the search box to filter by invoice number, customer name, or phone.
- Date range: Use the From/To date pickers to filter invoices by date.
Filters apply instantly as you type or select dates. The CSV export and Print list actions respect the current filters.
Printing Invoices
There are two ways to print:
1. Print from Invoice Detail
- Open the invoice.
- Click Print in the top action bar.
- A print document opens in a new tab. Your browser's print dialog opens automatically.
2. Print from Invoice List
- On the Invoices page, click Print next to any invoice.
- A print document opens in a new tab.
Print Formats
Quick Invoice supports 4 print formats:
| Format | Size | Best For |
|---|---|---|
| A4 Invoice | 210 × 297 mm | Full-size business invoices |
| A5 Invoice | 148 × 210 mm | Compact half-size invoices |
| 80mm Receipt | 80mm wide | Standard thermal receipt printers |
| 58mm Receipt | 58mm wide | Narrow thermal receipt printers |
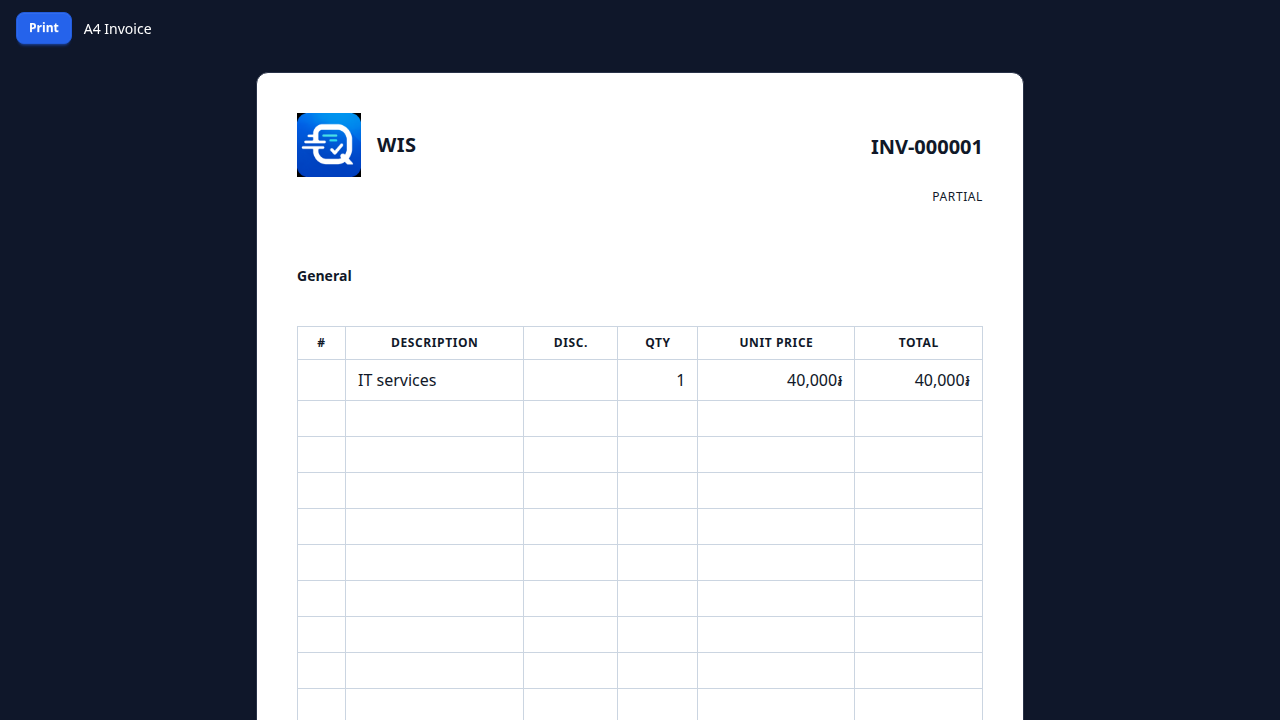
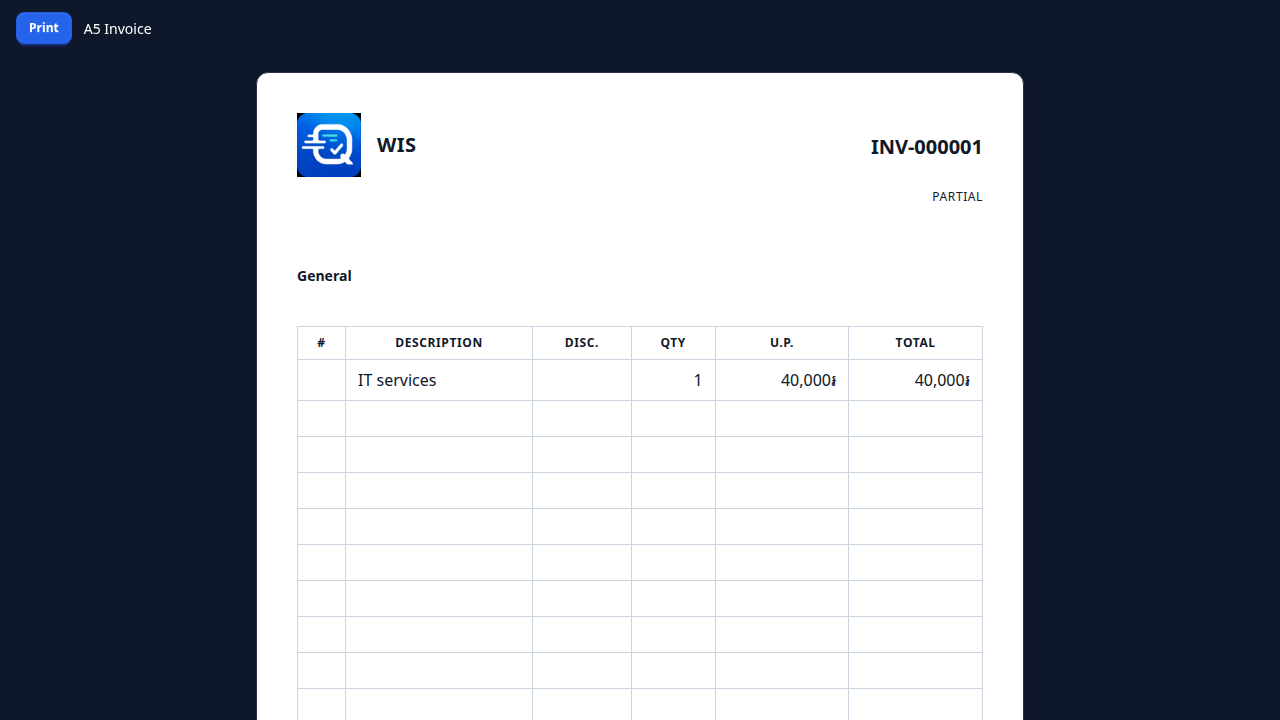


You can set your default format in Business → Print Settings. You can also change the format per invoice before printing.
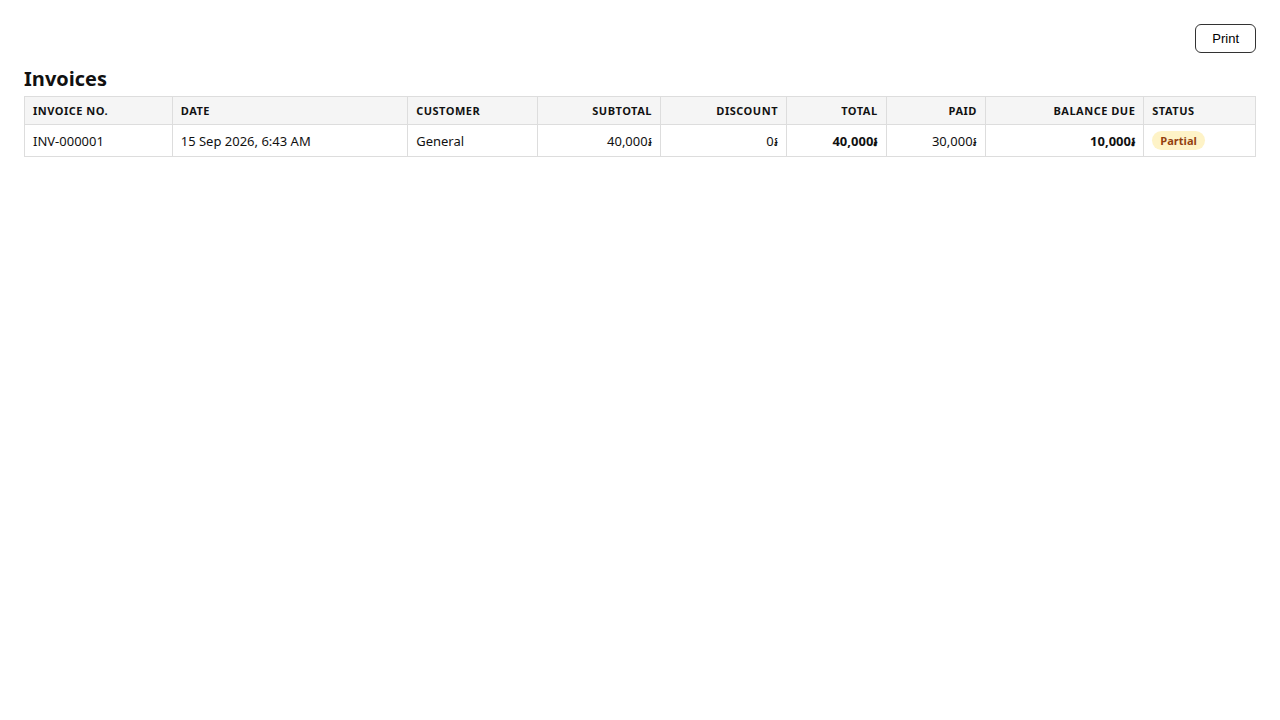
Printing the Invoice List
Click Print on the Invoices page to print a summary list of all visible invoices (after any search/filter is applied).
Print Language
You can choose the print language per invoice, independent of your app language:
- Follow app language — uses your current app language setting (default)
- English — forces English text on the printed invoice
- ខ្មែរ — forces Khmer text on the printed invoice
This is useful for bilingual businesses. For example, your app can be in English, but you can print invoices in Khmer for Cambodian customers, or vice versa.
You can set the print language from:
- The invoice creation form (before creating the invoice)
- The invoice detail page (before printing, using the dropdown in the action bar)
CSV Export
Click Export CSV on the Invoices page to download all visible invoices as a CSV file.
The export includes all currently filtered invoices (respects your search and date filters).
You can open the CSV file in Excel, Google Sheets, or any spreadsheet application.
← Back to ToCDark / Light Mode
Click the moon/sun icon in the top navigation bar to toggle between dark and light mode.
Your choice is remembered across sessions.
← Back to ToCLanguage
Quick Invoice supports two languages:
- English
- ខ្មែរ (Khmer)
Switch language from:
- The language button on the login/landing page
- The Account page (for logged-in users)
Your language preference is saved and remembered.
← Back to ToCAccount Settings
Go to Account by clicking your avatar in the top-right corner.
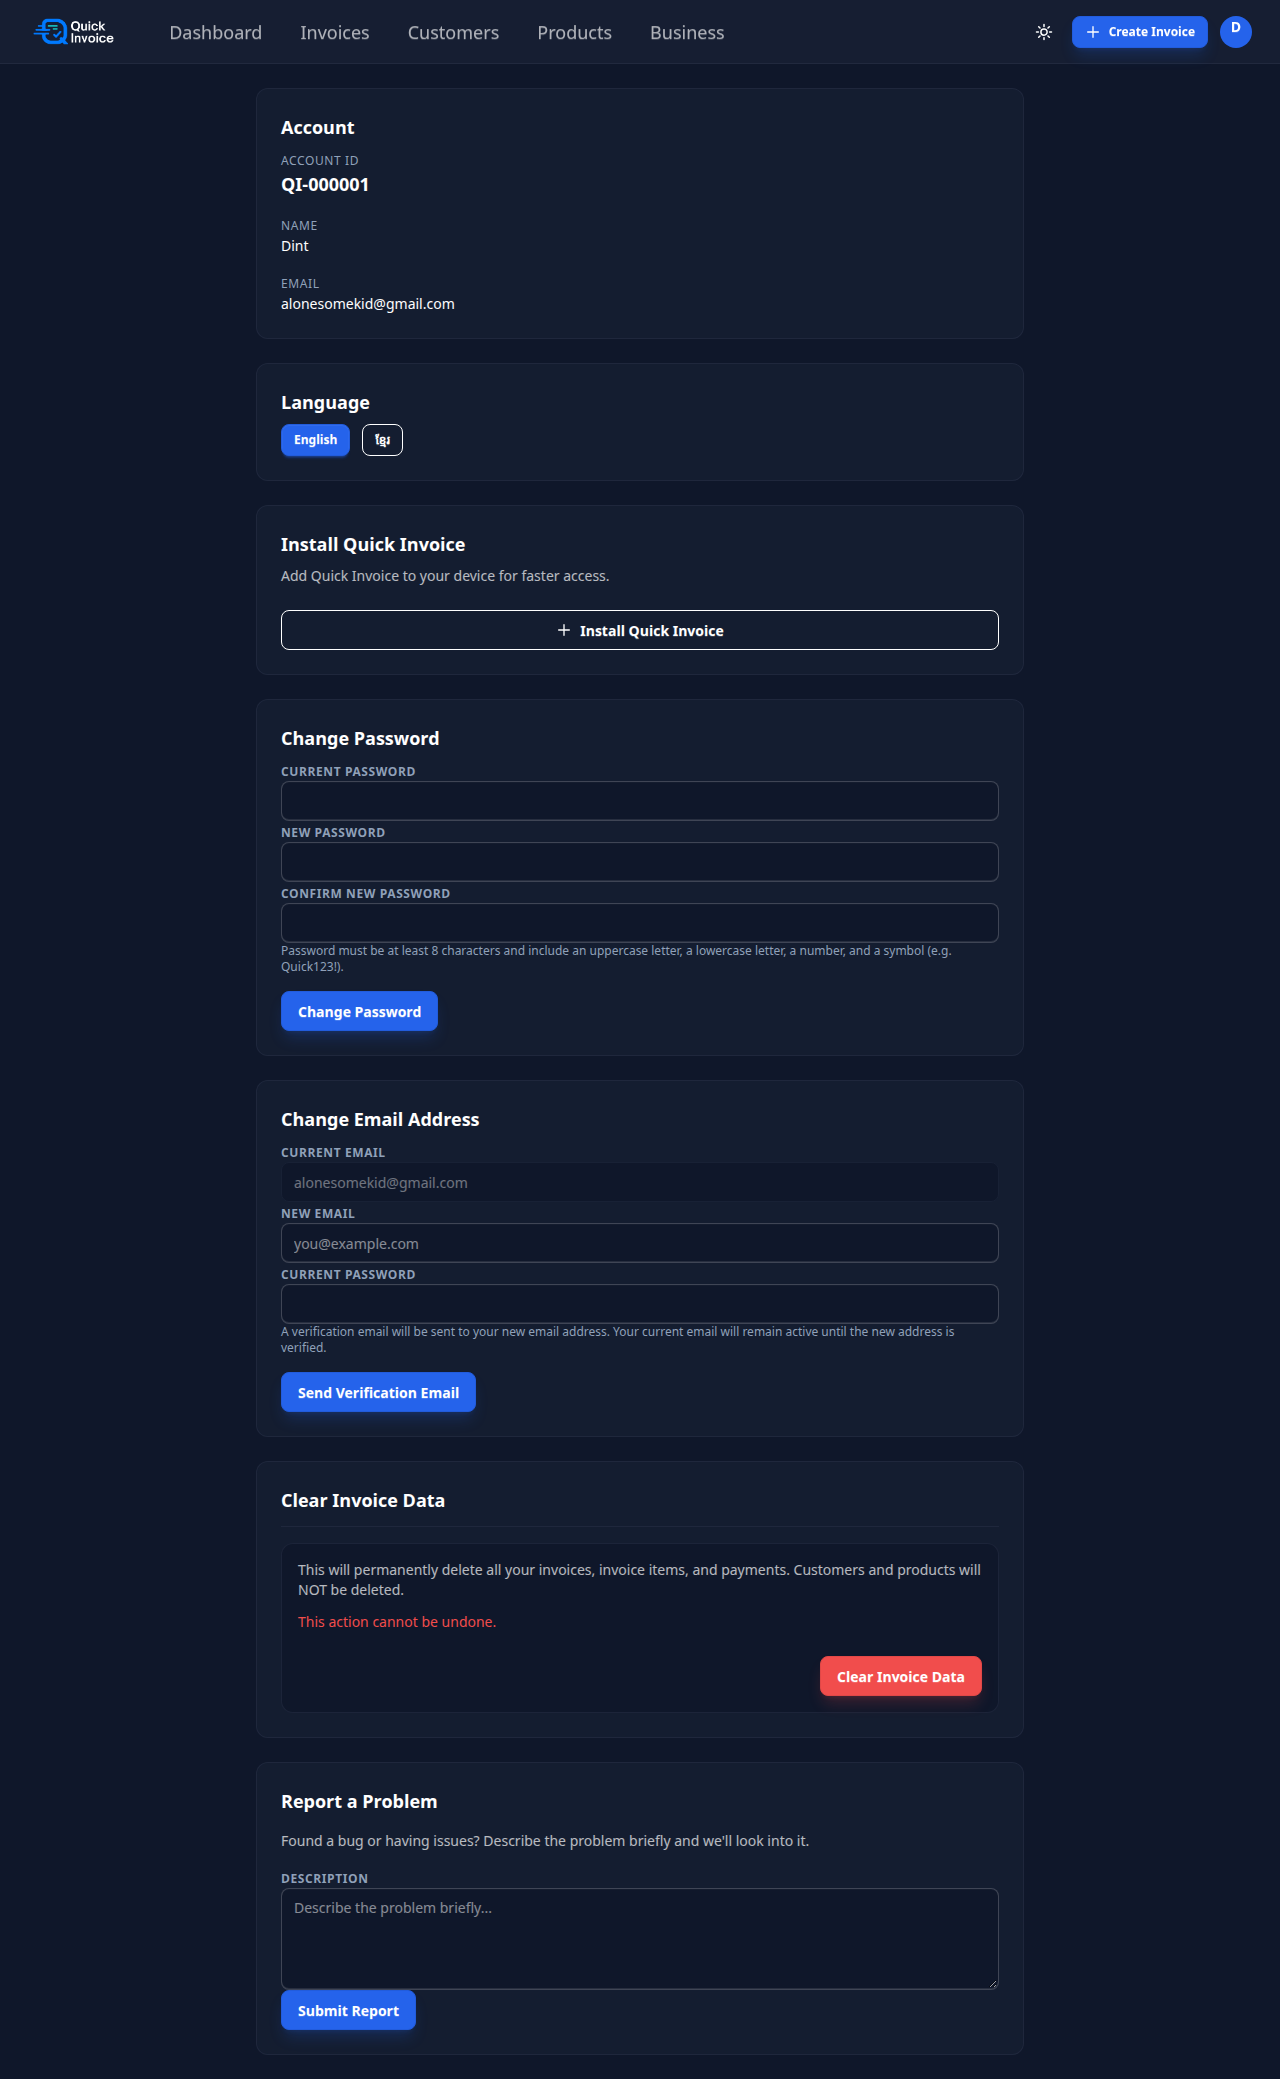
Account Information
- Account ID — your unique Quick Invoice code (e.g., QI-000001)
- Name — your display name
- Email — your login email
Change Password
Enter your current password and new password to update it.
Change Email
Enter a new email and your current password. A verification email will be sent to the new address. Your current email stays active until the new one is verified.
Install Quick Invoice (PWA)
You can install Quick Invoice as an app on your phone or computer. Click the install button on the Account page to add it to your home screen.
← Back to ToCReport a Problem
If you encounter a bug or issue:
- Go to Account.
- Scroll to Report a Problem.
- Describe the issue briefly (up to 500 characters).
- Click Submit Report.
Your report is saved in the system and sent to the development team.
← Back to ToCClear Invoice Data
This feature permanently removes all your business data:
- All invoices and payments
- All customers
- All products / services
- All categories
Your account and business settings are preserved.
How to Clear Data
- Go to Account.
- Scroll to Clear Invoice Data.
- Enter your password and click Continue.
- Scroll through the warning message.
- Type CLEAR in the confirmation box.
- Enter your password again.
- Click Clear All Data Permanently.
Rules & Limitations
| Rule | Details |
|---|---|
| Currency is locked | After the first invoice is created, you cannot change currency. Delete all invoices to change it. |
| Invoice numbers are sequential | INV-000001, INV-000002, etc. Cannot be customized. |
| Customer data is copied | Changes to customer records do not affect existing invoices. |
| Products are templates only | Deleting a product does not affect past invoices. |
| Items merge on save | Items with same description, price, discount type, and discount value are merged automatically. |
| Password requirements | Min 8 characters, must include letters, mixed case, numbers, and symbols. |
| Logo size limit | Max 1MB. PNG, JPG, or SVG. |
| Footer lines | Max 80 characters per line, up to 3 lines. |
| Report a Problem | Max 500 characters. |
| Print auto-close | Print tab closes automatically after printing (Chrome and Firefox). |
| Email verification | Required before accessing the dashboard. |
Feature Reference
| Feature | Location | Description |
|---|---|---|
| Dashboard | Top nav → Dashboard | Business overview with stats and recent sales |
| Business Settings | Top nav → Business | Business name, logo, currency, print settings |
| Customers | Top nav → Customers | Customer list and detail pages |
| Products | Top nav → Products | Product/service templates |
| Categories | Products → Categories tab | Organize products into groups |
| Invoices | Top nav → Invoices | Invoice list, search, filter, export |
| Create Invoice | Top nav → Create Invoice | New invoice form with quick-add products |
| Invoice Detail | Invoices → click invoice number | Full invoice view with payments |
| Record Payment | Invoice detail → Payments | Add full, partial, or deposit payments |
| Print Receipt | Invoice detail → Payment → Print | Print receipt for individual payment |
| Print Invoice | Invoice detail → Print | A4, A5, 80mm, 58mm formats |
| Print List | Invoices → Print | Print summary of filtered invoices |
| CSV Export | Invoices → Export CSV | Download filtered invoices as CSV |
| Share Invoice | Invoice detail → Share | Copy secure shareable link |
| Print Language | Invoice detail → dropdown | Choose English, Khmer, or follow app language |
| Dark Mode | Top nav → moon/sun icon | Toggle dark/light theme |
| Language | Account page | Switch English / ខ្មែរ |
| Account | Top nav → avatar → Account | Password, email, data management |
| Report a Problem | Account page | Submit bug reports |
| Clear Data | Account page | Permanently delete all invoice data |
| PWA Install | Account page | Install as app on phone/computer |
Quick Invoice V1 User Guide — Generated 2026-09-18. Based on actual application testing via Playwright browser automation.